Saturday, 24 September 2011

Apple Traybake


Towards the end of Shahr Ramadhan every year, our mosque holds an auction to raise money for various causes. Its a fun time, when everyone bakes different cakes and make desserts to sell.
This year, I wasn't sure if I was going to go. I spent the entire day working on my designs and finishing my chores and by 4pm I was finally free.
I honestly didn't want to miss the auction and I really really wanted to bake something- even if it was simple.

I've mentioned the Good Food baking application on my iPod before. It has so many recipes..some which turn out good while the others..not so good. But hey, its fun to try baking the different things!!
Anyway, I have professed my love for cooked apple before, and I really thought about making something with it.
Apple pie? Apple Crumble? Apple Dappy?
I had seen a recipe for an Apple Traybake and thought I would give it a go.
The recipe was quick and simple enough for it to be ready in an hour or so.

It looked great and smelled lovely, but truthfully, I didn't get a chance to taste it. I cut most of it up for the auction and gave the rest to a friend who always loves to taste the results of my random baking sprees. There wasn't much point leaving any for home because since it was summer, we mostly lived on cold drinks rather than eating anything after breaking our fasts.

It did receive some good feedback though and the friend who isn't a fan of cooked apple also loved it.

Anyway, I thought I may as well share the recipe.
After looking at it, I think that the next time I bake it I might add some mixed spice or cinnamon to give it a flavour boost.

It was way too simple!!!


Ingredients:

450 grams cooking apple (such as Bramley)
juice of 1/2 lemon
225g butter, softened
280g golden caster sugar
4 eggs
2tsp vanilla extract
350g self raising flour
2tsp baking powder
demerara sugar, to sprinkle

Method:
Heat oven to 180C/fan 160C/gas 4. Butter and line a rectangular baking tin (approx 27cm x 20cm) with parchment paper. Peel, core and thinly slice the apples then squeeze the lemon juice over. Set to one side.

Place the butter, caster sugar, eggs, vanilla, flour and baking powder into a large bowl and mix well until smooth. Spread half the mixture into the prepared tin. Arrange half the apples over the top of the mixture, then repeat the layers. Sprinkle over the demerara sugar. 3 Bake for 45-50 mins until golden and springy to the touch. Leave to cool for 10 mins, then turn out of tin and remove paper. Cut into bars or squares.

Serve it warm with vanilla ice cream or custard and enjoy!! :-)
-S

Thursday, 15 September 2011

'Perfectly Chocolate' chocolate cake :-)

There are so many different types of chocolate cakes. When I was young, My mum used to make chocolate fudge cake that made us kids go crazy.
It was so moist and gooey and chocolatey that I remember sitting on the table and moulding my slice of cake into a basket or any other thing like it was play dough.
And then eating it :-/
Hey, I was a kid and it was fun!!!!

I have made fudge cake again, many times and never get tired of it. I once wanted to bake it again for my parents anniversary but didn't have any yogurt at home, which is one of the main ingredients in the cake. I could have waited till I went out to buy some but I really really wanted to bake at that moment, and I only wanted it to be a yummy, moist chocolate cake.
Anyway, I set about searching the internet for a good recipe and came across the Hershey's website which has the most gorgeous recipes!!! One of the recipes was for a 'Perfectly Chocolate' chocolate cake. The recipe was too simple only required the basic ingredients that everyone keeps at home.
After doing my excited jig, I ran down to the kitchen and quickly began baking.

About an hour later, the cake was ready. It was so quick and easy that I was a bit skeptical about what it would taste like.
After making a ganache and whipping it up into a mousse, I iced the cake and it was ready to be served!!

The cake was fantastic. 
I can't describe how soft and moist and chocolatey it turned out and I would totally recommend anyone to bake it. The great thing is, it isn't dense and doesn't feel very heavy, which is why its great. You don't need to worry about the frosting making it too sweet.

I haven't made fudge cake ever since I found this recipe :-/
They do taste different, this cake is light while the fudge cake is dense.
I usually choose to bake this cake, not only because of the results but also because you don't need to worry about it going off to quickly (because of the yogurt) in the summer- unless of course you use the mousse or ganache frosting- you should probably then store it in the fridge.

Just a couple of weeks ago I used the same recipe for tiny cupcakes that I made for Eid. This time I reduced the baking time from around 30-35 minutes to 20 minutes.
I was really really pleased with the results and so was my taste tester :-)


This is what it looks like on the inside!!


Ingredients:

  • 2 cups sugar
  • 1-3/4 cups all-purpose flour
  • 3/4 cup HERSHEY'S Cocoa ( I used the normal Bourneville cocoa)
  • 1-1/2 teaspoons baking powder
  • 1-1/2 teaspoons baking soda
  • 1 teaspoon salt
  • 2 eggs
  • 1 cup milk
  • 1/2 cup vegetable oil
  • 2 teaspoons vanilla extract
  • 1 cup boiling water

Method:
  1. Heat oven to 350°F. Grease and flour two 9-inch round baking pans or just one pan if you don't want it to be sandwiched.
  2. Stir together sugar, flour, cocoa, baking powder, baking soda and salt in large bowl. Add eggs, milk, oil and vanilla; beat on medium speed of mixer 2 minutes. Stir in boiling water (batter will be thin). Pour batter into prepared pans.
  3. Bake 30 to 35 minutes or until wooden pick inserted in centre comes out clean. 
  4. I got the recipe from here
  5. You can use any kind of Frosting that you want. Here are the two types that I use;
  6. Ganache/ Mousse:
  7. 175 ml Double cream
  8. 10 ounces Dark cooking chocolate
  9. Method:
  10. -Chop the chocolate up into small pieces and place them in a heat resistant bowl.
  11. - Separately, in a pan, heat the double cream on a medium heat till it reaches a boil.
  12. -Pour the cream on to the chocolate and leave it to stand for 2-3 minutes.
  13. -Stir it till it becomes a smooth mixture.
  14. The more chocolate you add, the firmer the ganache will be.
  15. You can pour this on to the cake as it is.
  16. OR
  17. Leave the mixture until it is completely cool and then beat it with a hand mixture until it becomes thick and fluffy. You can then pipe it on to your cake.

  18. Frosting for the cupcakes: (Enough for around 30 cupcakes)
  19. 2 cups (4 sticks) unsalted butter
  20. 14 oz semisweet chocolate, melted and cooled
  21. 2 and a half tablespoons milk
  22. 2 teaspoons vanilla extract
  23. 5 cups icing sugar
  24. Beat butter until smooth. Add chocolate until combined. Add the milk, vanilla extract, and confectioners sugar and beat until combined on medium speed. Don't over mix!
  25. When making this frosting, once you pipe it on to your cupcakes, make sure you immediately decorate it (IF you are) with sprinkles, chocolate shavings etc. because the frosting creates a thin outer shell quite quickly and loses its stickiness.
  26. Happy Baking :-)
  27. -S

Saturday, 20 August 2011

Flapjacks

Its Shahr Ramadhan!!! I absolutely LOVE this month. The atmosphere, the fasting and the spiritual bond between all the muslims around the world that is intensified.
Its amazing how much one can get done in a day in this month. I have heard so many people say that they manage to get so much more work done while fasting than they do when they're not. I think maybe its the burst of energy that we get when we fast.
It's indescribable.
The days have been flying by and I haven't even realised it!
Among the hundreds of things that I love about this month, one of them is waking for Suhoor. (The meal we eat before starting our fast- it's a lot like breakfast!!)
Ever since forever, every time we woke up before our morning prayer to eat our meal, I always used to have a strange feeling in me.
I think that at this very moment, thousands upon thousands of muslims dotted around the country are awake, preparing to start their day of fasting. I don't know why, but this feeling always gives me a sense of exuberance.

I must admit though, it is really difficult to actually eat properly at that hour. Especially eating something that is slow energy releasing.

Can I just say here that I really, really, REALLY don't like porridge.
I tried it once because of its 'wholesomeness' and almost gagged. I tried to make it more exciting by flavouring it with cinnamon and raisins but still no luck. At the end i just had to chop in some strawberries which was the only thing that helped me eat it.

All I can say is never again!!!

Anyway, my mum gave me an idea. She suggested that if I make flapjacks, I could snack on it and that way I would get filled up because of the oats.
I baked them. Last night at 1.30am :-)
I wasn't getting any sleep and I was kinda excited to bake after so long. I haven't baked much this month because we hardly eat anything at night after breaking our fasts.

I tried a new recipe out which turned out great. To get flapjacks that were chewy and soft, I made them quite thick and chunky. If you want them crispy, all you have to do is spread them out on a bigger oven dish and make it a thinner layer.
I added some dried coconut and chocolate chips to the ones that I baked last night, but you could add anything you want or just make them plain if you prefer.


The basic recipe:

7oz butter/margarine
7oz condensed milk
7oz sugar
14oz oats

(Optional)
Desiccated coconut
Ground almonds
Chocolate chips
Raisins
Dates
Ginger syrup

Method:
Preheat your oven to 170°c.
Melt the butter, sugar and condensed milk in a large pan. Once everything has dissolved, add the oats and any other of the optional ingredients that you want. I used about 4oz of the desiccated coconut and 150 grams of milk chocolate chips.

Grease a tray and line it with baking paper. Place the mixture into the tray and flatten it as best. (if you want individual ready cut pieces you can use cupcake cases)
Place it in the middle of the oven and cook. Because I made them quite thick, I left it in the oven for about half an hour until it was golden brown at the top.
If you are making them thin, leave them in the oven for just 20 minutes.

Enjoy folks :-)

-S

Sunday, 31 July 2011

Date & Walnut Loaf

I love family time. I think most of us do.
The moments when we sit with our loved ones, -the old and the young- laughing, talking, sharing anecdotes and advice are without a doubt the most precious to me. There were times back home when we were a 'proper nuclear family'- Parents and kids. We used to do everything together. Wake up in the morning and share breakfast as one, have lunch together in the afternoons and of course dinner at night. The moments when we all used to 'chill out' in the evenings and the weekends, collectively sitting in the living room and sharing the stories of our days or even just watching television- these are all my most treasured memories. Often we used to get together with our grandparents and extended family and let our hours pass by whilst we spent time together.
Of course life moves on. 
Some of us got married, the others went off to university and everyone created a life for themselves. And now I appreciate and realise the beauty that we had been granted. There is NOTHING like family. The love that you feel when you're with them is incomparable. The security, the warmth and the happiness is unprecedented.
It happens every now and then though- we all do gather together- albeit a bigger group. Now its married couples instead of single kids, small children everywhere and - A WHOLE LOAD OF MORE LOVE :-)

Recently my grandparents had come over from Africa. I only got a couple of days to spend with them but savoured those few moments. Since they watch the amount of sugar that they have and usually avoid the ready made available snacks from the supermarkets, I really really wanted to make something that they would enjoy when they would settle in the evenings with their cups of tea.
Something wholesome and enjoyable.

I chose Date and Walnut Loaf.

Since this takes a long time in the oven, I had to get up quite early on a Sunday morning to make it, but it was totally worth it.
They really REALLY enjoyed it!!! 
Since there's a lot of dates in this loaf, I just cut down the amount of sugar I put in by a third or a half and it still tasted pretty good.
Although when I make it otherwise, I follow the recipe properly.

I find this considerably more time and energy consuming than the other things that I bake, mainly because of it being a dough and also because of all the chopping required.

But its worth it :-)


Here's the recipe:

Ingredients:
8oz Plain flour
8 oz chopped Dates
4oz Margarine
4oz Brown Sugar
3oz chopped Walnuts
1tsp Baking Powder
1 tsp Soda Bicarbonate
1 egg
6tbsp milk

Method:
Rub in flour, baking powder and margarine.
Add in Sugar, walnuts, dates and mix it all together.
Add in the egg lightly beaten.
Mix the Soda bicarb with the milk and use this mixture to bind the dough together.
Place the mixture in a 1lb loaf tin and bake at 160c for 11/4 hours.

Once it is done, let it cool in its tin for around 5 minutes and then transfer it on to a cooling rack. Let it cool completely before slicing.

Make yourself a cuppa and enjoy :-)

-S

Thursday, 21 July 2011

Salted Caramel Sauce

Salted caramel is my new favourite thing right now.
Its amazingly thick creaminess with a slight crunch of saltiness is divine.
I know I always go back to mentioning my childhood memories, but those memories are the driving force of my passion.
I love capturing the tastes and smells from my childhood. Trying to bring back all the memories that made me who I am today.
The happy, carefree days, spent with family, enjoying different foods and the endless hours of playing with friends and siblings in the dusty streets of our nieghbourhood in Africa.


On the weekends, I mostly remember us having our treats. We used to go out for picnics with family and friends or to restaurants where we used to run around the tables playing or sit and listen to my parents talking, filling our minds with vivid imaginations of the past whilst we waited for our food.

I remember we once were on our drive back from one of our outings when we passed an ice cream place called Dairy Inn. Of course with three noisy kids in the back seat, the right thing for my parents to do was to give in and take us there for our treat :-)
It was so exciting!!!...I had never before seen the yumminess that I saw that day.
After choosing the ice cream of our choice, it would be dipped in to a caramel or chocolate sauce that would immediately harden into a crunchy shell, encasing the ice cream. I think a reason why my parents didn't mind us having them was that they didn't have to worry about us having ice cream running down our arms whilst we tried to eat it because it was protected in the shell.

Of course me being the chocoholic that I always have been, I went for the chocolate option. Not that once but every single time we went to Dairy Inn!!
Once to my utter horror and distress they had run out of my chocolate dip. I was so upset, but after reassurances that the caramel flavour would be just as good, I agreed to have it.
That was the point.
I fell in love with caramel.

There was something about the flavour that I absolutely loved and that is what I tried to capture when I tried to make my caramel sauce.
Of course now being an adult, I don't mind variations. Its fun to try out different things!!
This caramel sauce does not harden but is delightfully sticky and the occasional crunch you get from the sea salt flakes enhances the flavour and makes it all the more delicious!! You can pour it over your ice cream or have it with fruit or brownies or any other sweet or not sweet treat!!

I have two recipes, one that is ridiculously easy that I just tried out myself, and of course Nigella Lawsons'.


Both turn out amazing
Both are yummy.
I want some.


NOW!! :-)


My recipe: (I didn't really use any measurements for this but will try and put it here in its numbers)

Half or 3/4 can of sweetened condensed milk
A heaped tablespoon of golden syrup OR if you don't have that, then you can use any toffee flavoured icecream/cake sprinkles or chunks
Half a teaspoon of good quality sea salt flakes (you can use as much as you'd like)
75ml double cream

All you have to do is put the condensed milk and golden syrup into a small pan and place it on a low heat and keep stirring until it becomes a thick consistency. Pour in the cream to dilute it slightly and keep stirring. Finally sprinkle in the salt flakes.
It takes a while, but the patience is well worth the effort.

(Also, while making this, you WILL be tempted to taste. Be careful, it can burn you very easily )

Nigella's recipe:
75g salted butter, best quality
50g soft light brown sugar
50g caster sugar
50g golden syrup
125ml double cream
½-1½ teaspoons finest salt, to taste

Melt the butter, sugars and golden syrup in a small, heavy-based saucepan and let it simmer for 3 minutes, swirling and stirring every now and again.
The sauce should turn from gold to dark amber as it cooks.
Add the cream carefully, then half a teaspoon of salt, and swirl again. 
Give it a stir with a wooden spoon and taste – go cautiously so that you don’t burn your tongue – to see if you want more salt, before letting it cook for another minute, then pour into a jug for serving.
Both recipes make enough to serve 5-6 people.


Enjoy the yumminess :-)


-S

Friday, 1 July 2011

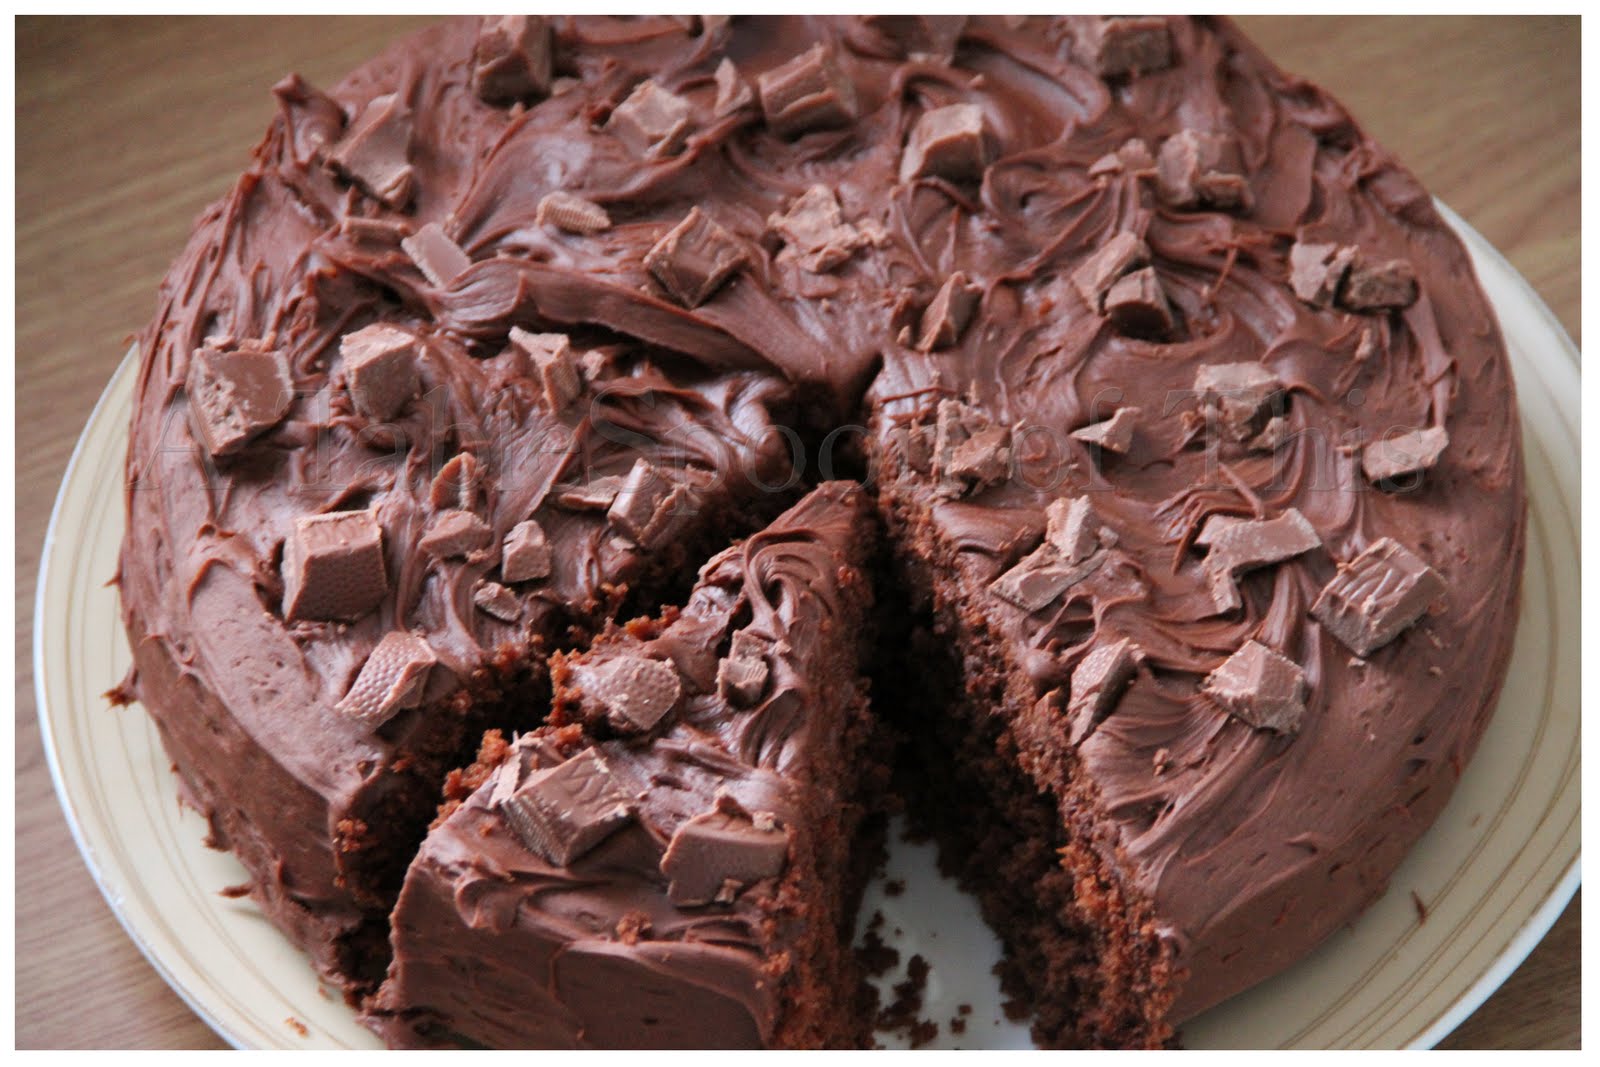
Chocolate Orange cake

Every time we open a box of cadburys Milk Tray, I always pick the orange flavoured chocolate. There's something about the orange flavour that cuts through the extreme creamy taste of chocolate. Its fantastic. It also smells gorgeous!..
Seriously, open up a box of Terry's chocolate orange and just smell it. You won't be able to resist picking up a piece and popping it in to your mouth.
I have loved orange flavoured chocolate as long as I can remember. Many years back in Africa, Cadbury's used to make something called 'Supa Snack'. I LOVED it!!! It was layers of wafer covered in an orange flavoured cream and coated in milk chocolate. Infact, I have a picture of myself as a complete baby holding a half eaten bar and chocolate smeared all over my face.
I don't think they make it anymore :-( I have searched high and low for it the last few times we went back home, but never found it.

Anyway, now that you all know how amazing I find orange flavoured chocolate, you will understand why this is without a doubt my favouritest cake ever!!!
I found the recipe for Dark chocolate and orange cake online on the GoodFood website and was so excited to make it.
This recipe doesn't use only the zest of the orange- oh no!! You have to use the entire orange so you get the lovely bang of flavour when you dig into this cake.
Not only are the results of baking this cake amazing, but the actual process is really fun too.
I'm not one who licks the spoon after mixing up the ingredients of a cake, but this one- I can't resist..it even tastes amazing uncooked!!!!
There's something really satisfying blitzing up a whole orange in the food processor. It may sound crazy but you would know what I mean if you try it yourself :-)
The results?? A moist, fluffy, ultra chocolatey, amazingly orange-y cake filled with tiny chewy bits of orange. 
The recipe includes a chocolate ganache to pour over the cake. It's gorgeous, but that's only if you don't mind the extra intensity of chocolate on top. I found making a milk chocolate ganache or whipping it into a mousse much yummier. I also added some extra orange chocolateyness by chopping up some Orange flavoured chocolate and sprinkling it over the top of the cake.
Also, you don't really have to follow the exact measurements of the ganache, make it according to the consistency that you enjoy.

Hate to break it to the rest of the world, but I ain't sharing this cake with anybody!!! :-P
Try baking it...you'll totally get what I mean!


Ingredients

1 Orange
100g plain chocolate
3 eggs
280g caster sugar
240ml sunflower oil
25g cocoa powder
250g plain flour
1 1/2 tsp baking powder

For the chocolate ganache:
200g plain chocolate
225 ml double cream

Method

Pierce the orange with a skewer (right through). Cook in boiling water for 30 minutes until soft. Whizz the whole orange in a food processor until smooth; let it cool.

Preheat the oven to 180C/gas 4/fan 160C.Grease and line the base of a 23cm/9in round cake tin. Melt the chocolate in a heatproof bowl set over a pan of simmering water or in the microwave for 2 minutes on High, stirring after 1 minute. Let it cool.

In a large bowl, lightly beat the eggs, sugar and oil. Gradually beat in the puréed orange, discarding any pips, then stir in the cooled melted chocolate. Sift in the cocoa, flour and baking powder. Mix well and pour into the tin. Bake in the centre of the oven for 55 minutes, or until the cake springs back when lightly pressed in the middle. (Check after 45 minutes and cover with foil if it is browning too much.) Allow to cool for 10 minutes in the tin, then turn out on to a wire rack to cool completely.

Make the chocolate ganache: put the chocolate into a heatproof bowl. Bring the cream to the boil and pour over the chocolate. Leave for 2 minutes, then stir until smooth. Set aside until firm enough to spread over the cake - up to 1½ hours.

Transfer the cake to a serving plate. Using a palette knife, swirl the ganache over the top.

Have fun :-)

-S