Monday, 25 March 2013
Hazelnut & oat raisin cookies
A couple of months back my friends and I had a meet up where someone brought these gorgeous chewy, oaty and hazelnut cookies.
They didn't look so appealing but once we all tasted them.. We basically went nuts!!!!
I have never tasted anything non-chocolately as amazing as these cookies!
As soon as I got the recipe, I quickly started baking a batch. Trust me, one batch is NOT enough!!!
Fresh out of the oven with only a couple of minutes for them to cool down.. The taste tester was sold!!
YAY!!!
Wondering whether we were the only ones so crazy for these cookies, I packed a couple for my parents and passed them along. The reason for my uncertainty was that- there isn't any chocolate in these.. How can they be so good??
Yup they too fell majorly in love!!
I then baked another batch because I was so happy :-)
.. And then another to take to the family in London!! I was soo happy to see them.. From the oldest of 70 years to the youngest of 12- go crazy for these!!!
It was sooo worth the effort!!!
Here's the recipe..
Go bake them NOW!!!
Ingredients:
100g hazelnuts
100g undated butter, softened
200g soft light brown sugar
1 egg, beaten
1 tsp vanilla extract
1 tbsp runny honey
125g self-raising flour, sifted
125g jumbo porridge oats
Pinch of salt
100g raisins
A little milk if needed
Method:
-Preheat the oven to 190C/375F/Gas 5. Toast the nuts on a baking sheet for 5 minutes.
-Once toasted, rub with a clean tea towel to remove most of the skins.
-Roughly chop the hazelnuts and then set aside.
-In a bowl, cream together the butter and sugar with an electric whisk till smooth.
-Add the egg, vanilla extract and honey. Beat well until smooth once more.
-Combine the flour, oats and salt in a separate bowl, and stir to mix.
-Stir the flour mixture into the creamed mixture and beat until very well combined.
-Add the chopped nuts and raisins and mix until evenly distributed throughout.
-If the mixture is too stiff to work with easily, add a little milk until it becomes pliable.
-Line 2 or 3 baking sheets with parchment and roll the dough into walnut sized balls.
-Flatten each ball slightly, leaving plenty space between them.
-Bake in batches for 10-15 minutes until golden. Cool slightly, then move to a wire rack.
-Leave to cool completely before serving.
You can find the recipe here.
Enjoy :-)
-S
Sunday, 13 January 2013
Banoffee Pie
The past two months have flown by so quickly. My entire life has taken the biggest turn with the arrival of my beautiful baby boy! I can't thank Allah enough for this blessing. Every single moment is spent caring for a whole entire tiny human being.
Surreal!!
I have been able to carry on baking and making desserts though!! Surprisingly enough!
I thought once my little baby would make an entrance, all my kitchen antics would fly out of the window. Well we can't live without sustenance can we?
Blogging however, seems to have taken a back seat. I really have missed taking pictures and writing about my baking..so hopefully this means I'll try and post more often.
My first attempt to making a dessert was a couple of weeks ago. Banoffee pie!!!
Creamy, decadent, sticky, sweet, buttery and crumbly....oh so delicious!! Luckily this recipe is so quick and requires each step to be made in shifts. Which is perfect for me :-)
First, a buttery, crumbly base made with digestives and topped with a gorgeous, golden caramel layer and finished off with bananas, cream and (ofcourse) chocolate.
You can't have any dessert without chocolate. That's just wrong!!!
So far everyone who has tried this pie has fallen in love. Try making it. You will too :-)
For the base:
500 grams digestive biscuits
150 grams butter (melted)
For the Caramel:
100 grams butter
100 grams dark brown soft sugar
397 grams sweetened condensed milk (one can)
For the topping:
1 carton double cream
1 pack (2 fingers) Cadbury's twirl (I choose this because it is the perfect hit of chocolate!)
4 large bananas
Method:
Line your springform pan with greaseproof baking paper and grease it using butter.
Place the digestive biscuits in a food processor and whizz until they are completely crushed. Pour in the melted butter and whizz again till it starts sticking together.
Pour it in to your pan to create a base. You can also place some of it on the sides of the pan to create a pie shell.
Place in the refrigerator for a couple of hours or in the freezer.
In a non-stick pan, melt the butter and the dark brown soft sugar until the sugar dissolves. Pour in the condensed milk and keep stirring. Once it comes to a boil (It will start spitting so be very careful and maintain a distance from the pan)- let it boil for minute, while continuously stirring. It will become thick and come off the edges of the pan. Pour it on top of the base and place it back in the refrigerator for a couple of hours.
Once the caramel has completely cooled, beat the double cream in to soft peaks.
Slice the bananas and place on top of the caramel. (To avoid the bananas going black too quickly, instead of putting lemon on them which could cause them to taste slighty different, I submerge the bananas in boiling hot water for a couple of minutes before peeling . The skin will go black. This way the bananas don't go black in the pie for 2-3 days).
Pour the Whipped cream on top of the bananas and sprinkle the top with chocolate.
Leave in the refrigerator to chill for a couple of hours before serving.
Enjoy :-)
-S
Saturday, 13 October 2012
Iced Coffee
After posting my last entry I was asked how to make the Iced coffee drink that was in the background of the pictures...
Its really really simple and quick to make and accompanies brownies (or anything else really) well!!
It doesn't really have any specific amounts for the ingredients and you pretty much have to go with taste.
Ingredients:
Instant Coffee
Whole Milk
Sugar
Vanilla Icecream (optional)
Cocoa powder
Serve with:
Whipped cream
Chocolate sauce
Method:
- Mix the instant coffee with sugar to taste and boiling water. (You have to use a generous amount of coffee because of the milk and ice cream that you will be adding)
- Pour the mixture, with a couple of pints of milk in to the blender. You can also add the vanilla ice cream (if you want to) at this point.
- Add some cocoa powder in to the mixture
- Blend it all together
- You can either store this in the fridge before serving so that it is chilled or if you have made this well in advance, freeze the mixture in ice cube trays and then blend them before serving.
- Drizzle some chocolate or caramel sauce in your serving glass and pour in your iced coffee, topping it up with whipped cream and more chocolate sauce.
Enjoy :-)
-S
Tuesday, 2 October 2012
Brownies!
I finally have access to the internet!!! After a month!!!.. The past month we moved house and have been trying to settle in to it.. which has been a process slightly slower than times before now that everything I do takes double the amount of time!
Its so strange how dependant we've become to the internet. Without it, you're so cut out from the world. Literally. Its almost impossible to keep up with the news and also keep in touch with people.
And my blog!!
Its crazy how these months have been flying by. We're already in to October. The month I'm expecting the arrival of my little Baby inshaAllah. Please keep us in your prayers folks, because that's all we need now!!!
Anyway..today I'm going to post the recipe of one of the first three things I ever baked. Brownies!!! These simple, no fuss brownies never fail to make people happy. Over the years I've tried many other different recipes..Nigella's walnut brownies which are absolutely divine and many others..but for some reason this recipe has a very loyal bunch of fans. People who would much rather prefer these brownies to the decadent recipes that I have tried out as well.
I always have trouble taking pictures of brownies...or double chocolate chip cookies (that I have baking in the oven this very moment). For some reason, they never actually look appealing on camera.
Maybe its because I don't put too much effort in the pictures I take.
I really should!
This recipe doesn't require any real chocolate in it and somehow manages to end up with rich, chocolatey results that would leave you wondering how!
Here it is:
Ingredients:
1 cup Margarine/ Unsalted Butter
4 tbsps Cocoa Powder
2 cups Sugar
4 large Eggs, lightly beaten
1 and a half cups All Purpose Flour
2 tsps Vanilla Essence
Method:
- Preheat the oven to 350F / Gas mark 4
- Grease and line a pan. This makes quite a generous amount of brownies depending on the thickness.
- Melt the margarine in a pan under low heat.
- Remove from the heat and add in the cocoa powder. Stir it well and then let it cool till tepid.
- Mix the sugar, eggs and vanilla together with a hand mixer.
- Add in the flour in two additions and mix with a large mixing spoon.
- When it is just combined, add the cocoa and margarine mixture and stir them all together until completely combined.
- Bake for 30 minutes, but start checking at 20 minutes.
- The skewer that you pierce the brownies with to check should have some mixture stuck to it (so the brownies are not quite done). This is really important because over baking them can lead to dry results!
- Take them out of the oven and wait till it cools.
You can frost the brownies with anything that you like. For this recipe in particular, I prefer my mums Chocolate dropping recipe. Here it is:
Ingredients:
1 tbsp Margarine
2 tbps Cocoa
8 tbsps Icing Sugar
A little hot milk
Method:
-Melt the Margarine
-Add in the sifted Cocoa and Icing Sugar
-Mix it really well and then add in milk very little by little until you get a nice, glossy frosting in a thick consistency!
Pour the mixture on top. Sprinkle with Smarties (My personal preference :-P ) and enjoyyyyyy....
-S
Wednesday, 15 August 2012
Pankhas..Mandazis..or..??
Greetings people!!!!
I know its been a long long time since I've posted an entry. Believe me, its not because I haven't been baking and trying out new recipes, but its been ridiculously busy!!!
2 cups plain flour
8 tablespoons oil
I know its been a long long time since I've posted an entry. Believe me, its not because I haven't been baking and trying out new recipes, but its been ridiculously busy!!!
Its Shahru Ramadhan- (I can not believe we're already in to the last ten days) and time is just whizzing by so fast!! :-(
I haven't even had a chance to take decent pictures of the stuff that I make..just a few quick clicks with my phone and I'm done!!!
Hopefully, I'll be posting these recipes quickly, because very soon inshaAllah things are going to get really busy with a tiny little new family member! :-)
So what have I been trying out?? Gorgeous, melt-in-your-mouth, buttery Melting Moment biscuits, Ultra rich and indulgent Banoffee pie, Indian sweets and lots more!!!
Hmm, what should I start with??
A recipe I recently learnt from my sister in law.
We call it Pankhas. She calls it Mandazis. But really? I don't know what to call it.
I can describe it to you though!!
Crispy, golden, deep-fried, pastry-like bits of yumminess dipped in a gold, saffrony sugar syrup...
Pure decadence.
I'm not kidding. Its everything evil put together that brings together the yummiest results!!...When she makes them, they're flawless!!!!
Best eaten? When they're fresh and hot and crispy and just dipped in the sugar syrup!!!
The other day I decided to give it a shot. I was so surprised at how easy it was to make!
All you have to make is a simple dough and then roll it out and fry it.
Oh and make the sugar syrup.
But that's it!!!! I'm totally going to make this again. And again. And again :-)
Ingredients:
2 cups plain flour
8 tablespoons oil
Cardamom powder
2 cups sugar
Saffron
Orange food colouring
Method:
You have to start off making the sugar syrup so that it has cooled down completely before you dip in your 'pankhas'.
To do this, put in 2 cups of sugar, 1 cup of water, About half a tspoon Cardamom powder, a drop of orange or yellow food colouring and saffron in a pan.
Let all these ingredients reach a boil on a high temperature on your stove and then immediately lower the heat.
When you see the syrup thicken, add another half glass of water and let it boil till its sticky.
You'll be able to see the consistency and stickiness using your wooden spoon. Once its nice and thick, place it aside to cool.
Next, combine the 2 cups of flour, 8 tablespoons of oil and cardamom powder with your fingers. Bring them together as a dough with warm water.
This dough is so quick and easy to make. Make sure its not too soft or hard.
Divide the dough in to around seven little balls and then roll each one out quite thin. The thinner the better (because the crispier the results)- and in to a circular shape.
Then, squeeze the top and bottom of the centre of the circle together with your thumb and index finger, bringing them together to a butterfly-like shape.
Using a knife, cut it right in the center so that you end up with a fan like shape.
Fry in hot oil until they are golden and crispy and then dip it in to the sugar syrup.
Mmmmm...these are BEST on the day that they are made. Sooo easy to make and so worth the results.
Store them in an airtight container!!!
Take care folks! Hopefully you'll see another post very soon!!
-S
Monday, 25 June 2012
Banana hotcakes
Breakfast is always an issue for me. I'm always looking for variety. Something to start your day with that will sustain you and brighten up your morning.
After all, breakfast is the most important meal of the day right?
The other day I was longing for something hot and completely different. I usually go for baked oatmeal but that was going to take too long in the oven and I was hungry for food now!!!- so it had to be quick and easy.
After looking through whatever I had available in the kitchen I decided on some type of pancakes or hotcakes.
It was sooo easy. The batter took just a couple of minutes to whip together and while the hotcakes were cooking on the frying pan, I had time to chop up whatever fruit I wanted to accompany my breakfast with. In my case- strawberries ofcourse :-)
I also incorporated mashed banana in the batter to make it a bit more filling. The recipe
made enough to last for two days' breakfast so that was a bonus!!
Ingredients:
-Two ripe bananas
-Just over 1/2 a cup of plain all-purpose flour
-1 tablespoon sugar
-1/2 cup semi skimmed milk
-pinch of salt
-1 egg
-vanilla flavouring
Method:
Mash up your bananas nice and finely using a fork and set aside.
In a bowl, measure in the flour and the sugar and the salt.
In a separate mug, whisk the egg together with the milk and a little bit of vanilla flavouring/essence. Add it in to the flour mixture and stir it until its combined.
Add in the mashed banana and combine.
Heat up a non-stick frying pan (medium heat). You can spray it with some oil or butter but I didn't use anything at all. I didn't find it necessary and my frying pan behaves pretty well :-)
You can use 2-3 tablespoons of the batter per hotcake, depending how large you want them.
Once the batter starts forming bubbles, flip the hotcakes over and let it cook on the other side.
It's as simple as that!!
You can eat them plain or with maple syrup or with chopped up fruit or icecream!
Serve them hot because thats when they are at their best!!
This recipe is ridiculously easy and takes just about as long as double toasting your bread!!! It's well well worth it!!! try it out and enjoy :-)
Sunday, 27 May 2012
Vanilla cupcakes with strawberry flavoured frosting!
Whenever I look at cupcakes in stores or online, I just feel so envious of how beautiful they look.
I can never actually manage to get them looking pretty enough. Maybe its because of my complete lack of talent when it comes to decorating cakes. I usually just messily ice my cakes- because obviously taste matters much more- but more importantly- because I'm terrible at making any cakes look pretty and presentable!
Oh well, recently it was my friends' daughters' first birthday and I set a goal for myself to make cupcakes that I was actually going to be pleased with- with a pink theme :-), because pink is just awesome. and girly. and means I could incorporate something strawberry-ish to them!!
Anyway, I got myself a little cake frosting kit, cute pink cupcake cases and lots of pink sprinkles!!!...And then I started baking.
After deciding on soft, fluffy, vanilla cupcakes with a strawberry flavoured frosting I got started.
Cupcakes are actually fun to bake :-) and they don't really take that long either.
They are prettier and little kids love to eat them.
So do big kids :-)
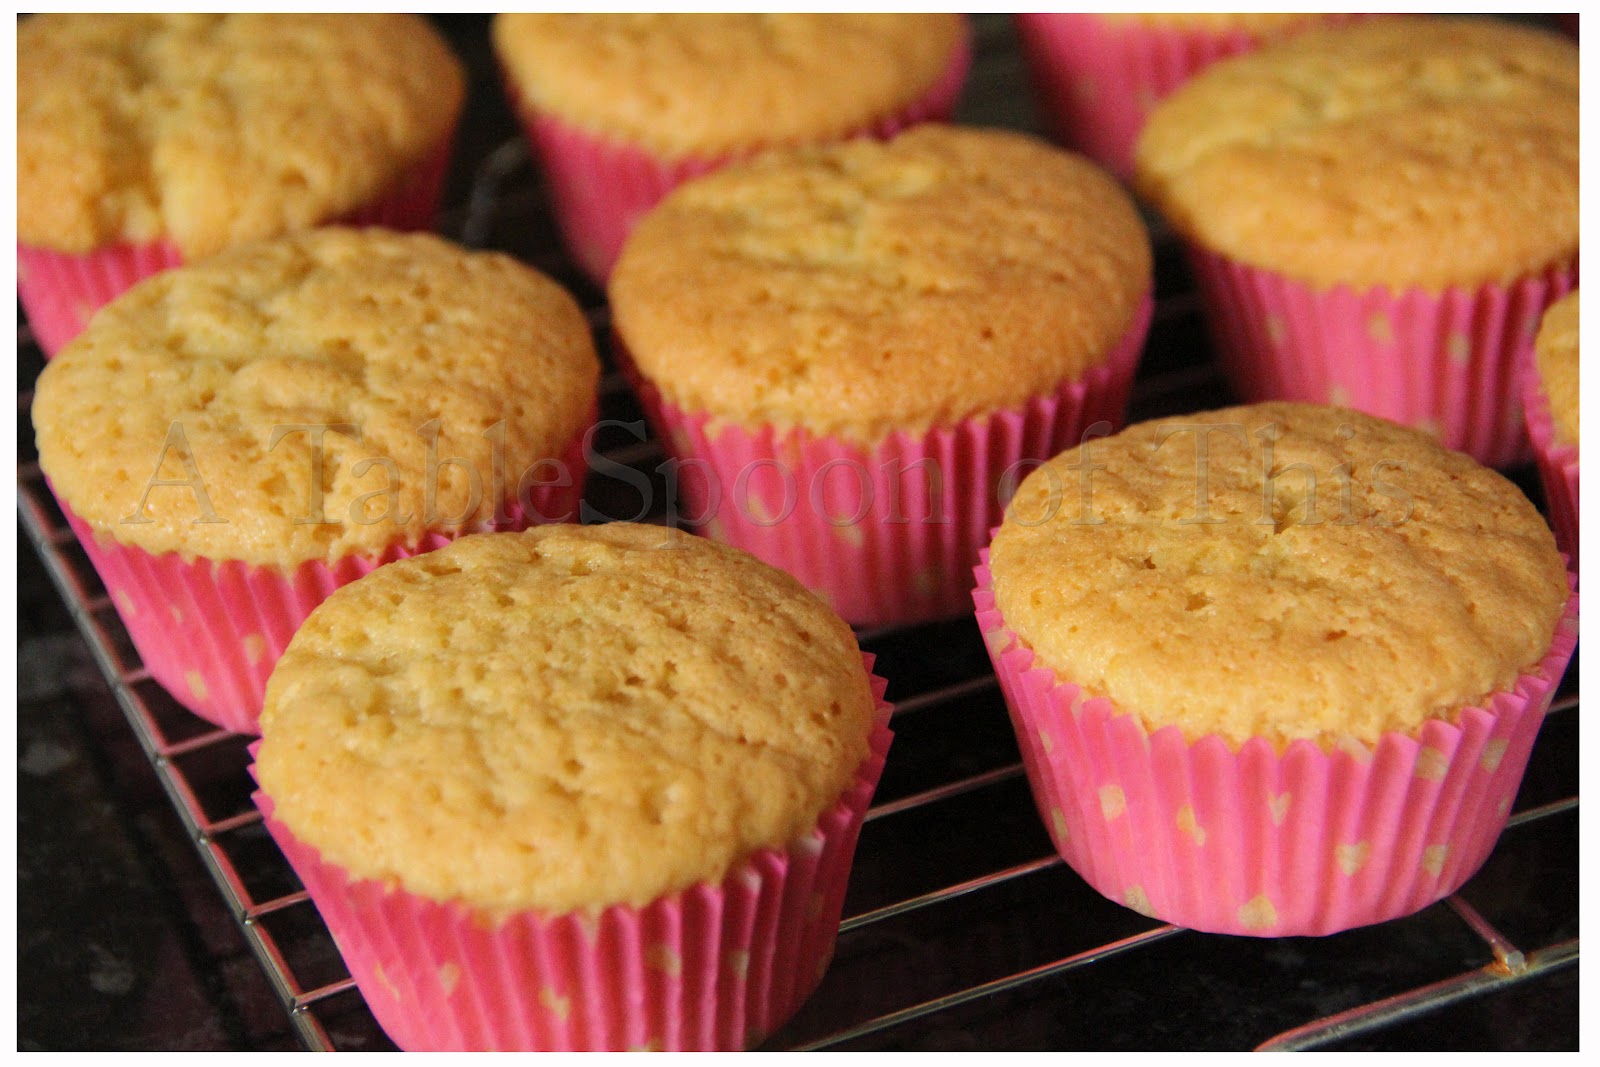
The result? Awesomely soft, fluffy, light as air vanilla cupcakes with a thick layer of strawberry flavoured frosting. Even I liked it- and I must admit I'm not really a 'non-chocolate cake' fan.
I kept some cupcakes for home and they didn't last long AT ALL!!!
A very nice feeling :-)
![]() |
| Light and fluffy :-) |
Ingredients for the cake batter:
4 eggs
8oz self- raising flour
8oz caster sugar
8oz margarine
Vanilla essence
Mehod:
Preheat the oven at Gas mark 4
Beat the sugar and the margarine with a hand-held mixer until the mixture becomes light and fluffy.
Add in the eggs one at a time and carry on mixing it.
Once the mixture is blended in together, add in the flour in additions.
keep mixing it.
Finally, add a few drops of vanilla essence in to the mixture. Mix it a little more and then using an ice-cream scoop, divide in to cupcake cases. Just fill it two thirds of the way because it needs room to rise.
Let it bake in the oven until risen and golden. It took me about 20 minutes.
Let it cool and then frost away :-)
Ingredients for the frosting:
2 large serving spoons of margarine.
4-5 large serving spoons of icing sugar (sifted)
You can add 1 tablespoon of any flavourings (like strawberry) or sifted cocoa (to taste).
Method:
Using a hand held mixer, thoroughly mix the icing sugar and margarine together until it is pale in colour.
Then add any flavourings.
The great thing about this cake recipe is that it is SO simple and takes such little time to make..and almost everyone loves the final result!
Enjoy :-)
Subscribe to:
Posts (Atom)